by Corey Morgan | Sep 22, 2022 | Exterior Painting, Pro Tips
What You Should Know About Staining in the Fall
As summer cools down and fall weather approaches, the window of opportunity to take care of exterior painting or staining projects is closing. That window tends to close a little quicker for stains.
There are a few variables that can greatly impact the success of a stain project. Weather must be in your favor to complete any stain project. Stains are fairly reliant upon the correct temperature range and dry weather in order to cure properly. The type of stain can also play a role due to different temperature thresholds that are required for a stain to adhere and cure properly. This time of year is your last chance to complete that stain project before winter arrives! Keep reading to learn more about what you should know about staining in the fall.
Solid Stains Vs Semi-Transparent Stains
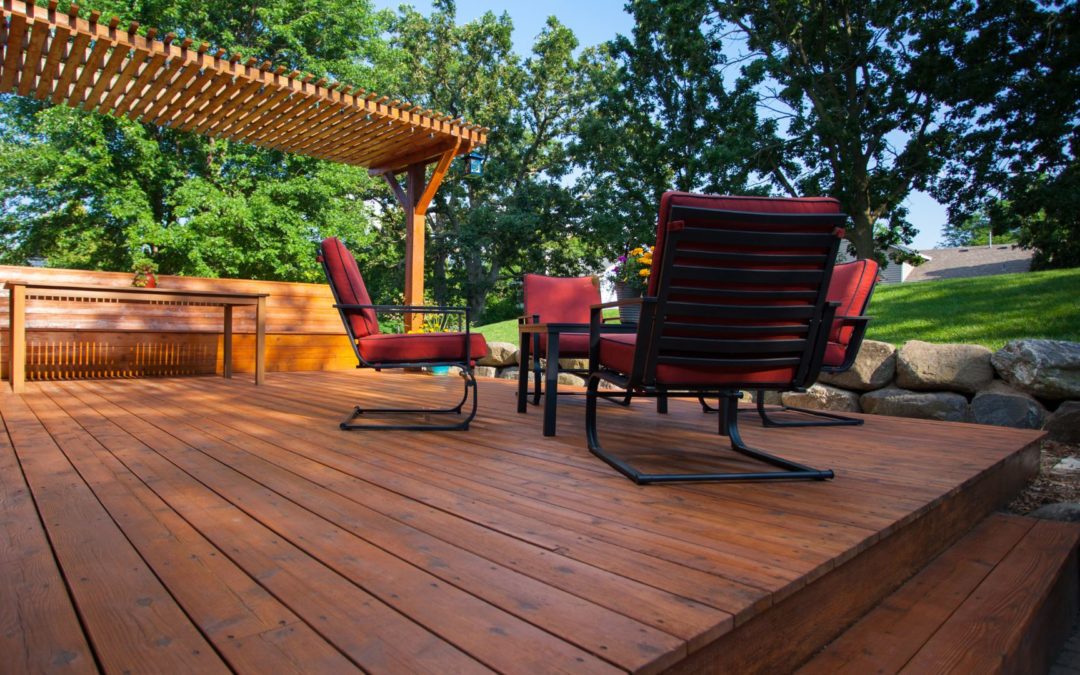
Semi-transparent stain
Stains provide an appealing look, but they also protect exposed surfaces. Typically, homeowners will stain decks, fences, pergolas, or the whole exterior of a home. The first thing you must know when approaching a stain project is what type of stain you are going to use. The two main types of stains most often used are solid stains and semi-transparent stains.
Semi-Transparent Stains
Semi-Transparent stains are likely what you think of when you think of stains. Semi-transparent stains preserve the natural wood grain while creating an appealing aesthetic. The wood grain will still be visible through a semi-transparent stain while adding an additional pop of color.
Semi-transparent stains are made to penetrate wood surfaces and bind with wood fibers. This helps to protect the wood and preserve it for longer. For that reason, it is typically better to use a semi-transparent stain on surfaces you may want to preserve for longer, such as your deck.
Solid Stains
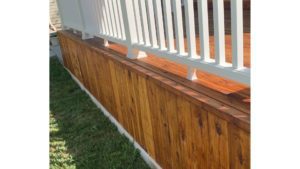
It’s important to understand what you’d like out of the look of your stain. Solid stains are more similar to paint and will cover the natural wood grain. If you want the wood grain to still show, a semi-transparent stain might be better suited for your project. Solid stains do not penetrate the wood or bind with the wood fibers. Instead, a solid stain lays upon the wood surface more like a top-coat of paint. Check out the image below of a solid stain project.
Solid stain deck
You can see how dark and thick the stain looks in comparison to a semi-transparent stain. Solid stains are a more stylistic choice when it comes to stains. When done right, a nice solid stain can really elevate your outdoor space by adding to the overall aesthetic while matching nicely with your exterior paint.
Weather & Temperatures Impact on Stains
Weather and the temperature of your environment are crucial factors when completing a stain project. Each type of stain has a temperature range required to apply the product and allow proper curing. You should always refer to the manufacturer’s guidelines when applying a stain. Same goes for paint, but stains can be a bit more finicky!
Temperature Threshold
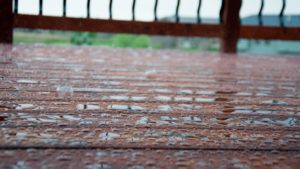
For both semi-transparent and solid stains the ideal range is between 50-90 degrees fahrenheit. If it is too cold, or there is rain/snow within the first 24 hours of applying a stain product, it will not adhere or cure properly. If it is too cold or too hot when applying a stain it can create spotty results and will be cumbersome to fix.
As mentioned before, solid stains are more similar to paints in their chemistry. For that reason, they have a wider temperature range that they can safely be applied. For a solid stain you can typically apply them all the way down to 35 degrees fahrenheit. Semi-transparent stains have a tighter window and you really should fall within that 50-90 degree temperature range.
We need to keep in mind that it may be a nice fall day around 70-80 degrees out, but once that sun falls, the temperatures drop. Your painter should be aware of the temperature drop at night. If the temperature drops below that 50 degree mark at night, your stain may not cure properly. This can be especially true here in Colorado where we can have quick temperature swings.
For this example we are using Sherwin Williams SuperDeck Exterior Deck Stain (Semi-Transparent & Solid).
Location Matters
How well your stain adheres to your surface can even be impacted by the location of what you plan to stain. For example, if you have a ground-level deck that’s located on a side of your home that receives less sunlight it won’t receive as much heat being in the shade.
During the fall, a shaded area may struggle to reach the ambient temperature that a stain requires. This will create a longer dry time and could increase the risk of your stain being impacted by moisture.
Conclusion
It’s vital that your painter is well aware of the proper temperature threshold that your stain requires for application. If it is too cold, your stain project will not adhere or cure properly. It’s always better to play it safe when applying stains! You can typically apply solid stains later in the year due to their wider temperature range. We recommend waiting for the proper weather to complete a stain project as opposed to rushing your project. If you have a stain project you’d like to get completed, Kind Home Painting Co. provides free estimates. For inspiration, be sure to check out our Instagram page HERE.

by Corey Morgan | Sep 8, 2022 | Exterior Painting, Paint Color Help, Pro Tips
What you should know about HOAs & Paint Colors
What To Know About HOAs
As a Denver painter that handles projects in neighborhoods throughout the entire metro area, we deal with a lot of HOAs (Home Owner Associations). If you are considering painting your home, one of the first things you need to know is if you have an HOA. If you do, it is vital that you have an idea of what it’s like to work with your HOA. Depending on the HOA, getting HOA approval for your desired colors can take some time. Certain HOAs can be fairly strict, so it is important to plan ahead of time if you want to get your project completed in a timely manner. Keep reading to learn more about HOAs and what you can expect when getting your paint colors approved.
How long does HOA color approval take?
We get this question asked all the time: how long does HOA approval take? This can be a tricky question to answer. Every HOA is different. Some HOAs have very quick turnaround times for color approval while others can take months. It really depends on the size of your HOA and how they handle inquiries for different projects. We always suggest that you figure out the color schemes that your HOA approves of before beginning your color selection process.
One of our favorite HOAs to work with is HRCA, Highlands Ranch HOA. They are very responsive and will get colors approved in no time at all. They are also fairly flexible with their residents’ color choices. This allows their homeowners to exercise a little more creativity and control over their color options.
An HOA that a recent client struggled to get color approval from was West Gold Meadows HOA. This particular HOA is located in Castle Rock, CO. This client had their colors denied twice and took roughly 7 weeks to get approval. We aren’t throwing shade at West Gold! But we wanted to include a real example from a local HOA. In our experience, there are a lot of HOAs that can be a bit more strict on colors and may have a longer turnaround time similar to West Gold. This can be due to staffing issues and the type of homes that make up the neighborhood.

How do I find my HOA colors?
Homeowners can sometimes struggle to even locate their HOA online, let alone figure out how to best submit colors. Finding your HOA approved color schemes can be a challenge sometimes. For some HOAs you may be able to find their pre-approved colors at Sherwin Williams. Sherwin tends to keep HOA colors on file for clients, but that isn’t the case for every HOA.
You can typically find your HOA online if you do a simple search for your neighborhood, city or county, plus the keyword “HOA”. From your HOA website you may need to register with your HOA if you have yet to do so. After that you should be able to submit a request through the resident portal. Or you may need to email them for color approval. The process may be a little different for each HOA, but should be fairly simple. When submitting your colors be sure to include the paint color name and paint code.
Be sure to check out our previous blogs about some specific HOAs and our favorite approved colors:
5 HOA friendly colors
Our favorite Highland Ranch HOA color schemes
Broomfield’s most HOA friendly colors
Top 10 Tallyn’s Reach color schemes
How to submit colors to HRCA
Why do HOAs deny colors?
Some HOAs can be more strict than others. Your HOA may deny colors if they don’t fall under their specified guidelines for what they allow. This is because HOAs often have desired color schemes to create a cohesive look throughout the neighborhood. It also helps them to exercise a little control over the look and feel of the homes. You should be able to find your HOAs approved colors on their website. This is a good place to start when selecting colors.

Can my painter help with HOA approval?
Your painter may be able to help find your HOA online or they may have knowledge of your specific HOA and the color schemes that they approve. However, you will need to personally submit to your HOA for color approval; your painter won’t be able to do this for you.
Your painter may be able to suggest some fairly HOA safe colors schemes as well to get you started in the right direction.
What about a color consultant?
Professional color consultants are extremely knowledgeable about color schemes that work for HOAs. If you are struggling at all with your color selection, we always suggest getting some insight from a certified color consultant. They will help you easily narrow down colors and find the perfect fit for your home, your preferences and your HOA requirements.
Check out our Color Consultation page to learn more about our color consultation services.
And if you are ready to get some pricing for your paint project, you can easily request a quote HERE. Thanks for reading! We hope this answered some of your questions about Home Owner Associations and getting color approval for your paint project.

by Corey Morgan | Aug 29, 2022 | Exterior Painting, Paint Prep
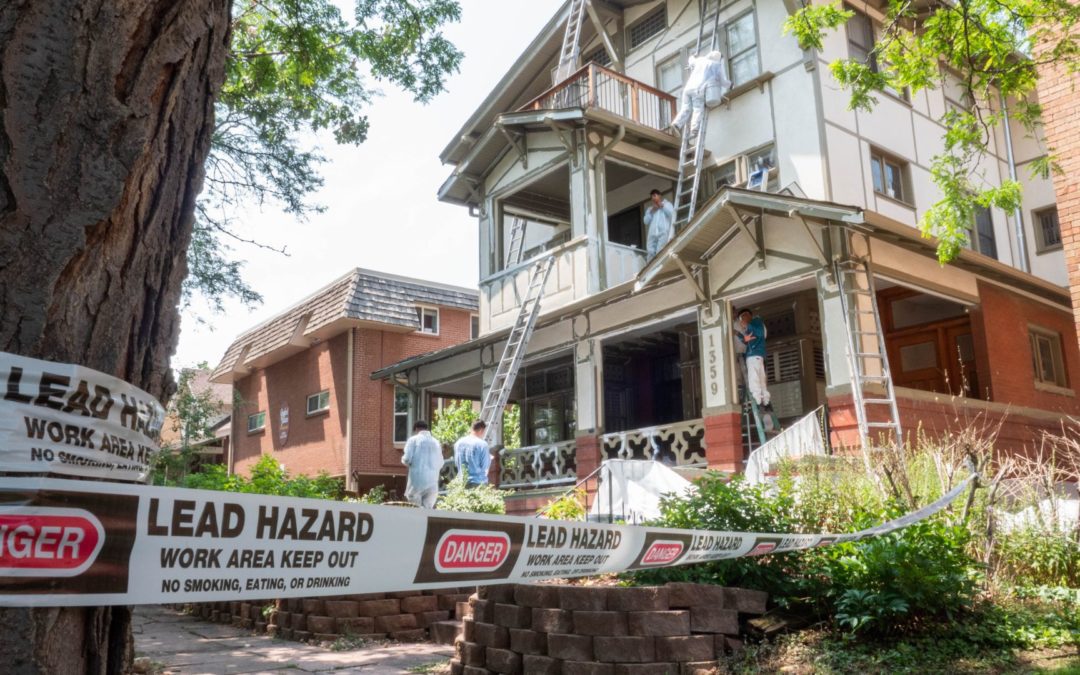
As a Denver painter, Kind Home Painting Co. sees a wide variety of home styles, ages, shapes and sizes. That means we encounter quite a few lead-based homes. If you live in the Denver area and are considering painting your home, you should be aware of how to properly handle lead paint. As we all know, lead-based paint can be harmful and very dangerous if handled improperly.
If you are hiring a professional you should be sure that you work with a lead certified renovator. It’s not against the law to work with painters that aren’t lead-certified renovators. However, lead-based renovations are regulated by the EPA and it is in your best interest to work with lead-certified renovators. As a lead-certified painter we take every precaution when it comes to painting lead homes and we participate in on-going training and certifications. Keep reading to learn what you should be aware of when painting a lead positive home.
What to Be Aware of When Painting a Lead Home
Testing for lead paint
The first thing you need to consider is the age of your home. Lead-based paint was commonly used on residential homes until it was banned from residential use in 1978. So, if your home was built prior to 1978 it is likely lead positive and you will need to test for lead. If your home was built after this it is likely lead-free, but it may still be smart to have it tested for lead if it was constructed close to that date.
You can identify lead paint just by looking at it if you know what to look for. When lead paint starts to deteriorate it will begin to crack and chip off. We usually say it looks like alligator skin when it begins to deteriorate! Your paint could still be lead-based without showing these characteristics. That’s why your painter should always test the paint and not make any assumptions.
The process for testing for lead paint is very simple. A lead test is easily performed by rubbing a lead test swab on the exterior siding of your home or taking a chipped off piece of paint and testing that sample. It is important to test multiple areas of the home for lead as well. Some areas may not come up as lead positive while others may. They will have the results almost immediately.
If your home is lead positive, don’t panic! It is not as big a deal as you may think. The important thing is that your painter is certified to handle lead and takes all the necessary precautions to contain it.
The dangers of lead paint
Most adults know better than to go around putting paint chips in their mouths, but most kids do not (and your pets definitely don’t know any better!). That’s why dealing with lead is all about containment and proper disposal. The last thing you want is to have any paint chips left behind for pets or kids to play with.
One of the more common ways that you or your loved ones may be exposed to lead paint is from dust. Dust from lead paint is one of the biggest issues that occurs when renovating a lead-positive space. Dust from lead paint can contaminate your soil and get tracked into your home. If there is enough lead dust accumulation it can become very hazardous. That’s why it is so important to mitigate lead contamination when painting or performing any other renovations. If your painter isn’t taking the proper precautions when handling lead, it can become a big problem. If you ‘d like to learn more about the dangers of lead paint you can check out the EPA’s Renovate Right Pamphlet.
Our process for handling lead paint
1. Never Pressure Wash A Lead Home
While we typically pressure wash all exterior projects prior to painting, we will never pressure wash a lead positive home. This is to ensure that we contain any lead from spreading or contaminating any areas. Our painters will hand wash the home as necessary to ensure the surface is clean and ready for a fresh coat of paint.
2. No Sanding
We will never sand any of the surfaces either. Sanding will obviously create a lot of unwanted dust. Our goal is to create as little dust as possible. The less dust we create, the safer you, your family and your pets are.
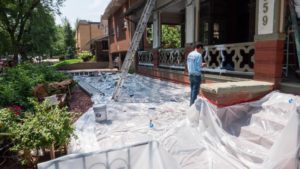
3. Collecting & Disposing of Lead Paint Chips
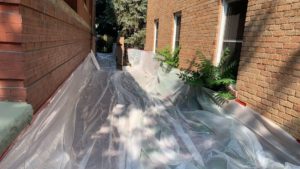
Now, while our process will ensure as little dust and spreading of lead particles as possible, we may need to scrape areas to prep them for a new coat of paint. As you likely know, lead paint will crack and tends to look a lot like alligator skin. In order to prep those areas, our painters will inevitably need to scrape away that failing paint. Don’t worry though, we will always put down plastic tarps to catch and contain any paint chips. Your Project Manager will ensure that the perimeter of the home and any area being worked on are prepped with plastic. Once our painters are done they will fold up all plastic and dispose of it properly to ensure no further contamination.
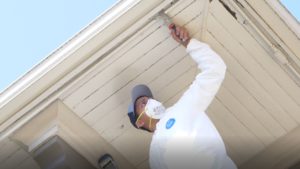
4. Provide Painters with PPE
We always provide all of our painters with PPE (personal protective equipment) on lead positive paint projects. PPE is vital for painters to safely handle lead paint. While it is up to them as to whether or not they use the protective equipment, it is required that we provide them with the proper materials. PPE may include gloves, gowns, shoe covers and face protection.
Conclusion – Precautions to Take When Handling Lead Paint
It is smart to make sure your home is tested for lead prior to any renovations, especially if your home was built prior to 1978. There are a lot of rules and regulations around proper handling of lead. That’s why you should always work with a lead-certified painter that is equipped to handle such a project. Your painter should never pressure wash or sand a lead paint project in order to minimize the creation of lead dust. And lastly, you should always make sure to collect any and all paint chips and properly dispose of them.
If you are looking for a Denver painter that can handle your lead paint project, look no further! To get a free estimate give us a call at (720)-6374805 or contact us HERE. If you have any questions please don’t hesitate to reach out!
by Corey Morgan | Aug 11, 2022 | Exterior Painting, Paint Prep
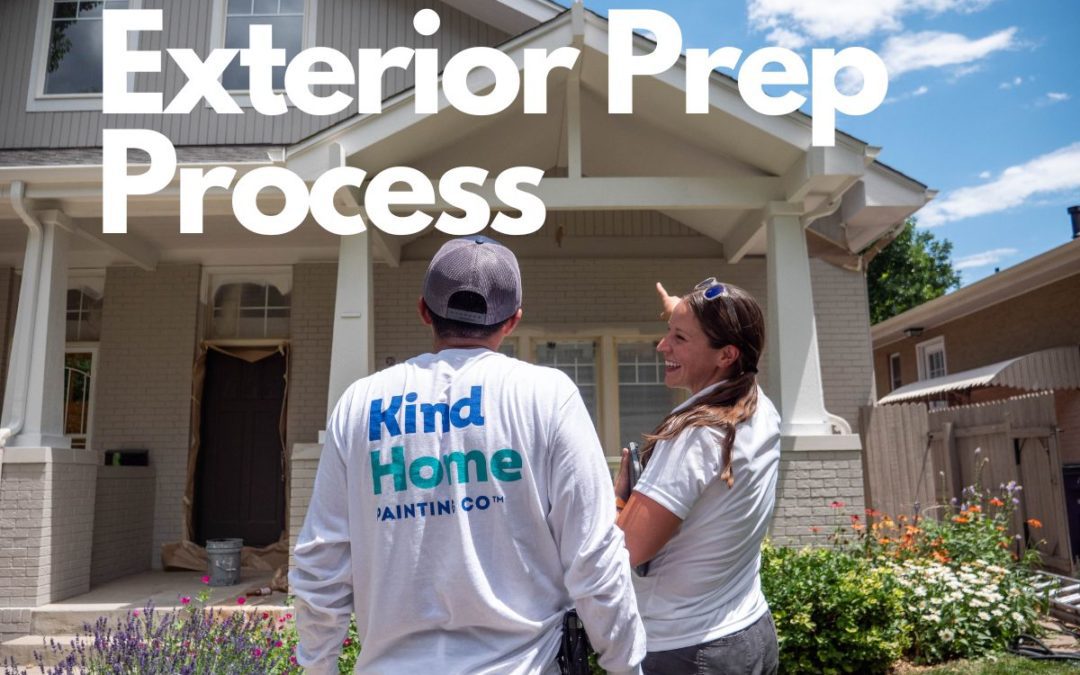
The Best Exterior Paint Prep
Kind Home Exterior Paint Prep Process
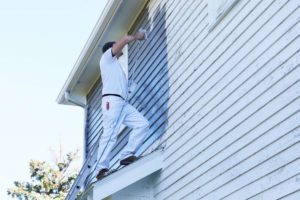
PREP is arguably the most important step in any paint project, but great prep is especially important for exterior painting. If you want your exterior painting project to last, it is vitally important to perform detailed prep. This rings even truer for Denver home painting where we have rampant weather patterns and harsh sun exposure. You should never expect to be able to just slap some paint on the side of your home and call it good. Without solid prep you are setting yourself up for failure. In this article we will detail the Kind Home exterior paint prep process and the importance of following these necessary steps when you have your home painted.
Paint Prep Steps

For any exterior painting project in the Denver area you should always inspect the home for rotted, damaged boards, dirty areas and loose nails/boards. We always perform the following on any exterior prior to painting to ensure that the surface is well protected and ready for paint:
- Pressure wash
- Repair damaged gutters
- Perform any woodwork repairs
- Mask off all windows & doors & protect surfaces
- Scrape failing paint
- Caulk
- Prime where necessary
Preliminary Services (Before Painting)
It’s important that we take care of a few items before your Project Manager and paint crew ever get to the job site. These items include pressure washing, gutter replacement and woodwork. We refer to this stage as preliminary services. Our Preliminary Service technicians will handle this portion of your project 1-2 weeks prior to painting to ensure that everything is complete in a timely manner and your home is ready for our paint crew when it comes time to paint.
Pressure Wash

We pressure wash the exterior of every home we paint. This is a light rinse to rid the home of dirt, cobwebs, debris and oxidation and to ensure that the paint has a clean surface to adhere to. If you don’t clean the surface first, paint will have a difficult time sticking to the exterior and it can cause problems down the line. The pressure wash should take between thirty minutes to an hour and is a non-invasive process. Our Pressure Wash Technician will just need access to your water spigot and all four sides of the home. You’ll want to make sure all doors and windows are closed!
Replacing Damaged Gutters
If your gutters are leaking it is a good idea to replace them. We provide gutter replacement services for any paint project that needs new gutters. The last thing you want is to have a leaky gutter damaging your freshly painted exterior. This can lead to early erosion of your paint, and even worse, rotted or swollen boards.
Woodwork
Woodwork is not a step to be overlooked. You can think of paint as the epidermis of the home. It is there to protect the substrate and fight off moisture and dirt. Over time though, your paint can wear down and allow for that moisture to penetrate the surface underneath. This leads to rotted and swollen boards. If your exterior has any rotting we always recommend getting those replaced. The longer you hold off on replacing damaged boards, the more it will cost you in the long run. Our woodworking team can take care of any and all of your wood replacement needs.

While there are some damaged boards that can get by with fillers and sealants, it is typically better to have them fully replaced. Without fully replacing a board it is at higher risk of failing quicker and allowing moisture to compromise the substrate. Not only will a new board hold up longer, it is more aesthetically pleasing. It is also important to be mindful of boards in areas where snow can build up. These spots on your home will be the first to have failing paint and rotted boards. During this step it is also important to re-secure any loose boards. You may notice loose nails or areas where nails have already popped out. We will be sure to nail those boards back in or use screws to secure them.
We will typically do woodwork repairs the week prior to painting. Our expert craftsman will ensure that every board is perfectly fit in place and ready for a new coat of paint.
Exterior Prep Process
Now that all of the preliminary services have been completed, it’s time for your Project Manager and paint crew to work their magic!
Masking, Taping & Protecting Your Home
It’s important to ensure that paint never gets where it shouldn’t be. That’s why we take extra precaution to protect your home from any paint overspray, spills or accidents. We always mask off all windows and doors and use drop cloths where necessary. The plastic film and painters tape we use to protect these areas will ensure no paint gets through when we’re spraying or rolling paint.
Scrape Failing Paint
We can’t stress enough how important it is to scrape failing paint to create a smooth surface for the paint to adhere to. We always make sure to scrape areas with bubbling and flaky paint. If you fail to scrape these areas the texture will show through. This step can take some time, but it is vital to a beautiful paint job that will last.

Caulk
Caulking, as we all know, helps to seal up your exterior and protect it from the elements. It is especially important to caulk all seams and receding nail holes. At Kind Home Painting Company we use Shermax Urethanized Elastomeric Caulk . This is a high quality caulk that was created to stand up to the harsh weather patterns we experience.
Some of the areas we will always caulk include:
- Spaces around windows
- Spaces around doors
- Seams where two boards meet
- Recessed nail holes
- Newly replaced boards
It’s important to note that you do not need to caulk all nail holes. We will only caulk the recessed nail holes to ensure that no moisture can seep through the board. If you caulk nail holes that are flush with the board you will be able to see the caulk and that added texture, which can be unsightly.

Priming
Priming, priming, priming! Our painters will always prime any bare wood, newly replaced boards or boards that have taken a beating and could use the added protection. At Kind Home Painting Company we will always prime the first few boards at the bottom of your home. This is to protect those areas from snow and the general wear and tear they are susceptible to.
We also pay close attention to valleys on the roof line where snow can collect and sit for long periods of time. These areas are typically the spots where paint will fail the quickest and boards will rot due to the extended exposure to moisture. To ensure that your paint job lasts we use peel bond primer. This primer is stronger than regular primers and will help seal the surfaces and provide a smoother finish.
Painting
Most homeowners don’t realize how long the prep process takes. This is where our painters will spend the majority of their time when working on your paint project because they understand that a paint job is only as good as its prep. Once we’ve completed all prep and your Project Manager has confirmed that everything is up to our standards, our painters will get to the fun part! The painting portion of any project is typically the fastest. We always spray our exteriors to ensure a smooth, professional and even finish. This is when you can kick back and watch your exterior transform before your eyes.
How to Prep for Exterior Painting
We hope that this article gave you insight into our prep process and what it takes to perform a beautiful paint job that will last for years to come. For inspiration for your Denver exterior paint project be sure to check out our Instagram.
If you would like a free painting estimate, you can fill out our form HERE. Thanks for reading and happy painting!

by Corey Morgan | Jul 28, 2022 | Exterior Painting, Paint Color Help, Popular Colors
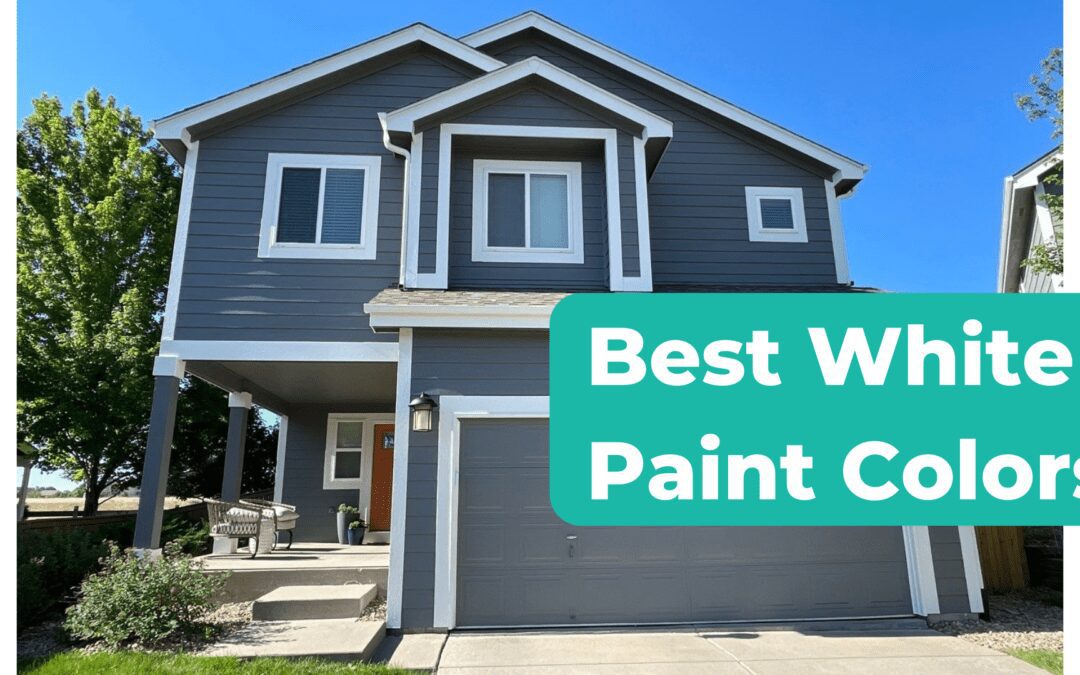
As basic as it may sound, white has been a trending paint color in 2022. This may be a result of the modern farmhouse craze or an attempt to battle the fading we often see here on Colorado homes. Either way we love this clean, timeless, and chic paint color. Every time we go out for a color consultation it seems like white is top of mind, but there is an overwhelming amount of white paint color choices. Even though it is a simple shade, narrowing it down can leave clients stressed and unsure. With that in mind, we thought it might be helpful to share with you the top white paint colors for colorado exteriors.
Pure White SW 7005

Pure White is a classic and we’ve mentioned it countless times on our Instagram account as well as over on our other site, Kind Home Solutions. This is a great white to use on your trim if you’re looking to create a lot of contrast and get a nice sharp pop against your body color. Pure White has just the smallest amount of yellow and black. This helps keep it warm enough to be used on an exterior, but it will look quite paper white to the naked eye. This is one of the most common exterior (and interior) trim colors we see clients go. This makes sense because of how reliable and simple it is. It can work with warmer body colors too, but generally we prefer to use it to contrast cooler body colors like cool grays and blues. That being said, we wouldn’t often recommend Pure White on the body of your home. It can feel quite stark, which doesn’t generally suit the style of most Colorado homes.
Alabaster SW 7008

If you want a white that doesn’t feel “too white” then Alabaster is a must try. You can think of Alabaster as a slightly toned down version of Pure White. It would be considered a fairly true white, but it has a little more warmth and depth that helps it appear just a bit softer than Pure White. This softness can be especially great for homes here in Colorado where we receive a ton of sunshine. When the sun hits your house it tends to amplify your colors and makes them appear brighter and more intense. Alabaster is harmonious because it really compliments the earth tones we see on most homes. It also goes great with stone and the surrounding landscaping associated with Colorado homes.
Nacre SW 6154

Many of the homes we paint here in Colorado feature some kind of stone or brick element. Beyond just protecting these elements throughout the painting process, we want to make sure your paint color complements your brick. One of the most common brick colors is traditional red brick and our favorite paint color to pair with red brick is Nacre. Nacre has a lot more warmth than the above mentioned whites and that additional depth really helps it coexist with red brick. The trick to finding the right paint color for any brick is that you don’t want the contrast to be too high. Since red brick is typically darker than say a blonde or light gray brick, you want to make sure you aren’t pairing it with a trim color that is too stark in contrast. Nacre works particularly well when your home is all red brick. However, if you do have some areas that require a body color just be sure to select a paint color that is on the warmer side and avoid cooler tones.
Greek Villa SW 7551

Greek Villa is a great paint color if you’re looking to create a pop of contrast without sacrificing warmth. This classic Sherwin Williams color can be used on both interiors and exteriors with amazing results. It’s clean, bright, and has a slightly yellow undertone that pairs beautifully with browns, reds, greens, and taupes. Greek Villa is quite a bit warmer than Alabaster so it makes for both a great body or trim color. This is especially true if you are trying to mimic the very popular modern farmhouse style and you don’t want a white that is too stark. This is an absolute go-to for our color consultants, so you can feel confident that you’re selecting the right color with Greek Villa.
Shoji White SW 7042

Over the past few years, Shoji White has risen to the top of the most popular white paint colors list. Shoji White is a very dynamic white that feels both inviting and modern. This is thanks to it’s combination of gray and warm undertones. Colors like Shoji White that can feel both timeless and contemporary have become more and more popular. Shoji White’s complexity creates a bit more interest while other colors can be flat and lifeless. It bounces between undertones which allows it to work with both cool and warm features. Much like Greek Villa, Shoji White is a great option for trim or body on your Colorado home. We’re confident we’ll continue to see more and more of Shoji White for years to come.
Most Popular White Paint Colors for Colorado
This list sheds some light on the most popular white paint colors we’re seeing on Colorado homes. Colorado is known for its natural elements, so it’s often important to make sure your home feels cohesive with the natural surroundings. This is true whether you are part of an HOA or not. White paint colors that compliment the Colorado landscape help make your home feel cohesive rather than stark. This lends to a sense of harmony. If you’d like more paint color inspiration and suggestions be sure to follow us over on Instagram where we post pictures of our work including the paint colors used on each house or contact our office to schedule a color consultation.
by Corey Morgan | Jul 20, 2022 | Exterior Painting, Paint Prep, Pro Tips
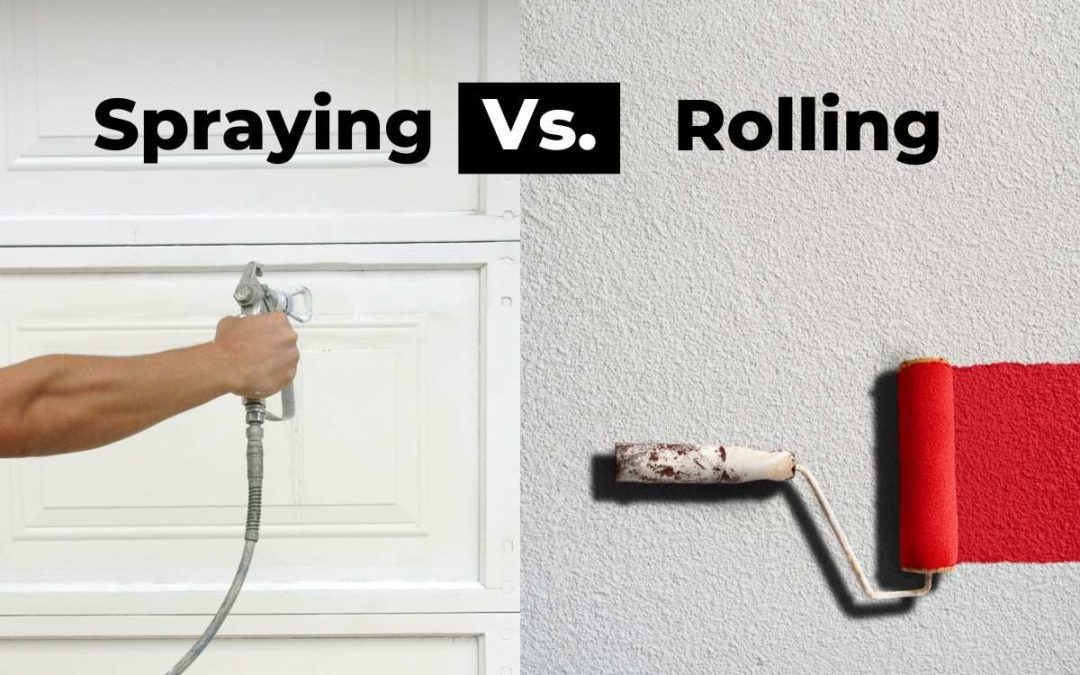
Is Spraying or Rolling Your Exterior Better?
The great painter debate – should you spray or roll exteriors? The answer might surprise you, because your home has a huge impact on whether you should spray or roll your home. This is a pretty controversial topic within the painting community, but we’re here to breakdown the question, is spraying or rolling your exterior better? Read on to learn the pros and cons of both exterior painting techniques.
Pros and Cons of Rolling Your Exterior
Paint rollers have been around since 1940 and Sherwin Williams was the first company to bring them to market. Rollers revolutionized the painting industry by speeding up the paint process and giving painters a better tool to cover larger surface areas. Nowadays, paint rollers come in a variety of sizes and thicknesses to help with any painting project; exterior or interior.
Pros of Rollers
- Great for large, smooth surfaces
- Cheaper than paint sprayers
- No brush marks
- Great for back-rolling to press paint into porous surfaces

Cons of Rollers
- Thin coats can be uneven
- Roller soaks up more paint so you use more product
- More expensive than brushes
- Rollers can’t be used for painting joints, corners, or smaller surfaces
Pros and Cons of Spraying Your Exterior
Paint sprayers and spray guns have actually been around longer than paint rollers. The first hand-held, air-powered paint spray gun was invented in 1907 and there have been many evolutions of that product since. We often find that clients who don’t like paint sprayers had a bad experience with them at some point. Paint sprayers from 30 years ago were quite different than the ones used today. Modern commercial paint sprayers have many benefits and have been optimized for residential and commercial use.
Pros of Sprayers
- Thicker, more even and uniform coats
- No paint waste as paint is not absorbed like with a roller
- Works well on uneven surfaces
- Faster and better application
- No brush or roller marks
Cons of Sprayer
- More expensive than rollers and brushes
- Need experience and practice using them to be effective
- Noisy compared to a roller
Exterior Painting – Spray vs Rolling
Now to the real question; which of these tools is better? Unfortunately, the answer isn’t so black and white. When it comes to our exteriors we tend to use a sprayer because it’s more efficient, offers better coverage, and gives a more professional finished quality. That being said, it’s important that your painter can utilize both of these tools because that’s what they are – paint tools. At the end of the day these tools can both be utilized to provide the best paint job. For example, if you are painting brick, stucco, or some other porous surface, you will want to use a sprayer to apply the paint and have another team member following with a roller to “back-roll” the paint in. Back-rolling helps to press the paint into the surface and get into those little nooks and crannies.
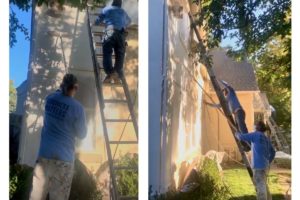
Kind Home Painters back-rolling the exterior of a Denver stucco home
For smoother surfaces like trim, wood, lap, vinyl, or metal siding, spraying is a much better tool to utilize because you won’t have any of those roller marks and you can angle the sprayer different ways to ensure you are getting full coverage on each board. Ultimately, one isn’t inherently good or bad. These are both great paint tools that should be utilized under different circumstances. To see some of the exterior paint projects we’ve sprayed and back-rolled, check out our gallery HERE. And for more inspiration for your next paint project, be sure to take a peak at our Instagram!
If you would like to get pricing for your project you can submit for a free estimate HERE.