Our certified color consultants are available for all of our paint clients to help with the color selection process. Choosing paint colors can be a stressful affair, but working with a paint color professional can simplify the process and guide you to colors you will love. We currently have two consultants that you may work with, and although we pride ourselves on being flexible enough to meet any clients needs each designer certainly has a specific style.
Meet Lexi Thompson – Fresh, Funky, and Inspired
Lexi is our most senior color consultant and has been in the painting industry for over six years. She has a passion for making the paint color selection process fun and working with clients to find colors that inspire them and transform their space. Lexi uses her years of experience and loves pulling inspiration from vintage designs, artwork, and current trends to find colors that will “wow”.
What’s Lexi’s Color Signature?
A designer’s go-to colors are ever changing and evolving and Lexi is no exception. With that being said, she is known for introducing pops of color that draw the eye in and create a focal point. Whether on a front door, with an accented trim color, or even using colors in nontraditional ways, like bringing color up onto the ceiling, she is always looking for a way to surprise her clients and engage the eye.
Lexi particularly enjoys working on larger, more complex projects like our Denver Victorians or playful homes such as those within the mid-century modern realm. She appreciates the opportunity to collaborate with her clients to find fresh new ways to highlight the unique features of these homes while honoring the history of these designs.
Some of Lexi’s Favorite Paint Projects
Dynamic Accent Walls
Working with a client who isn’t afraid of embracing colors is always a joy. As a color consultant, Lexi loves to seize these opportunities. This particular client had a very eclectic style and wanted to make sure of a dynamic set of accent walls. When it comes to coordinating several colors together Lexi finds it’s helpful to choose a theme for the space. In this case, Lexi and our paint client went with a slightly retro desert inspired color palette.
The different use of each paint color brings an interesting contrast to the space while infusing it with personality. Although making use of several different colors can feel overwhelming it’s also a great way to create a lot of visual interest and keep the eye moving throughout a space.
Playful Pops of Paint Colors
This exterior was a ton of fun because the client was looking to brighten up their dark exterior and was hoping to add some playful pops of color. In order to accomplish this, they chose to go with an allover neutral for both the body and trim.
The use of Whitetail SW 7103 helped create a canvas for the brighter colors to really pop against without feeling out of place. Making your trim and body color the same paint color is also a great way to remove the visual business of trim. So if your home has a lot of trim and you’re not a fan, then this can be a great solution.
The client had a very particular vision for the shutters and front door that was inspired by mid-century homes as well as coastal elements. After much deliberation they chose to go with Waterfall from Sherwin Williams and Frolic SW 6703 on the front door. The strategic use of these colors and their placement work with the home to bring visual interest without making things too busy. The clients loves it and we couldn’t be happier with the transformation.
Melding Traditional Elements with Interesting Contrast
Victorians can be intimidating for both clients and color consultants and this beautiful Denver home was no exception. This client was itching to bring some fun color back into the intricate details of the home after years of beige. When you’re going from a very simple scheme to a much more complex scheme, it can be difficult to visualize the final product so digital mockups were a must for this client.
Even with a relatively small painting area we landed on a total of SIX colors for this exterior. Lexi and the Kind Home paint client chose to create harmony by sticking to a single color family that would contrast the current brick color. The detailed pattern adds a ton of visual interest to the front of the home and helps to honor the historical beauty and integrity of these Denver homes.
Meet Yasmine Kot – Earthy, Classic, and Grounded
Yasmine is a bit newer to the painting world, but she uses her years of experience in marketing to create engaging spaces that work seamlessly with the vision held by each of her clients. Yasmine tends to favor classic color schemes that are harmonious with the Colorado landscape while also finding ways to incorporate current trends in a way that feels intentional and timeless.
What’s Yasmine’s Paint Color Signature?
With color trends changing frequently it’s important for designers to stay on top of things so they can bring valid and thoughtful input to each project. Yasmine is known for her use of earth tones and dark dramatics to create warm, balanced spaces that you want to sink into. She is inspired by nature and strives to bring life into spaces, often with an unexpected twist. Yasmine loves a dark dramatic trim color, rich accent walls, and subtle contrast that creates an elevated and elegant finished look.
Interior transformations are a favorite of hers along with clients who are looking for traditional and timeless exterior schemes. Painting your brick can feel intimidating but the transformation can be absolutely jaw dropping with the right color choices. She is always considering the fixed features within a space and uses those to guide her color selection in an effort to create a perfect harmony and balance.
Some of Yasmine’s Favorite Homes
Unique Uses of Paint Color
Every now and then you get the opportunity to work with a paint client who really wants to go for something new and unique. This Englewood painting client loved the idea of stepping away from the typical white trim and after talking through quite a few options they landed on Dark Knight SW 6237. By choosing a deep, rich slate blue they were able to create a complimentary color scheme with the existing floor color.
Alternatively, the client was also excited to get rid of the blue in the dining room in favor some more earthy and grounded. Yasmine pulled inspiration from popular 1970’s colors and went with Mossy Gold, a very unique greenish brown that brings a lot of warmth to the space.
Grounded Earth Tones
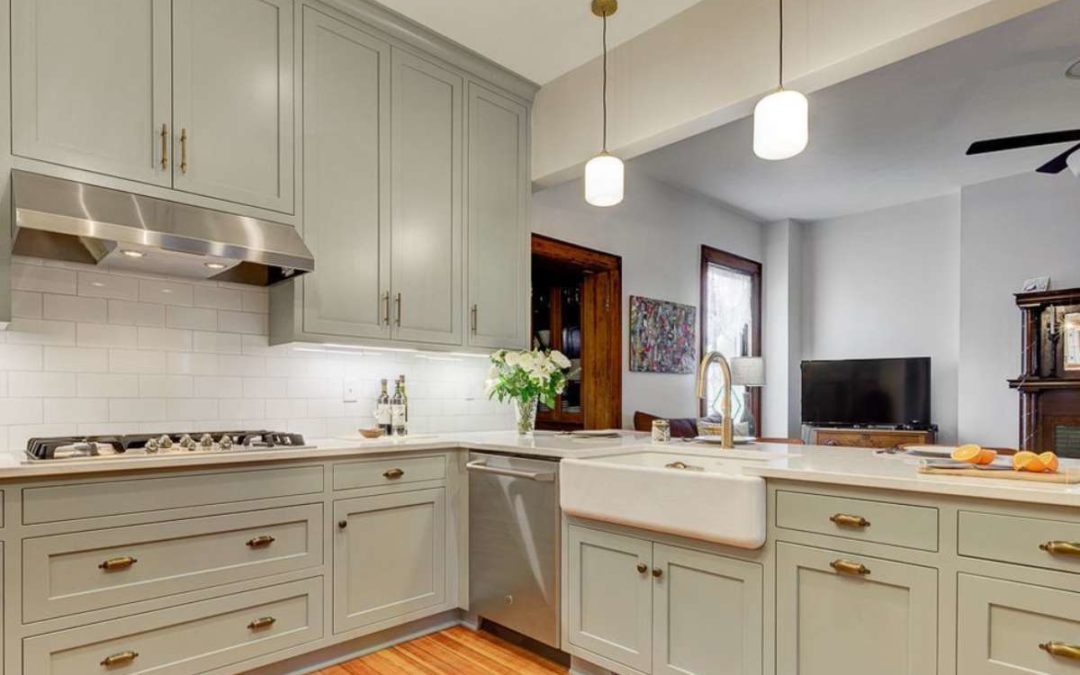
Sometimes the biggest transformations can come from the simplest changes. This client was eager to revamp her kitchen and was aiming for something earthy and on trend. Green cabinets have been a massive paint color trend for 2023 and Yasmine and the client found the perfect shade with Sage Light Green from Sherwin Williams.
This gray green works so well with the existing backsplash and the updated gold hardware, absolutely transforming the space into the kitchen of our client’s dreams. We couldn’t be happier with how this turned out and feel green will continue to gain popularity amongst clients.
Classic Contemporary Exteriors
Painting your stucco is a great way to keep your home looking refreshed and maintained. When Yasmine met with this client they were really hoping to land on a modern yet timeless color scheme for the exterior and loved the lighter grays. With that in mind they chose Mindful Gray, a warmer light gray from Sherwin Williams and paired it with Snowbound for a crisp, sharp contrast between the body and trim.
The front door is Downing Slate, which is a popular choice amongst clients and adds to the contemporary feel of the home. Getting rid of all the warm yellows and browns really helped this home feel more current and the clients couldn’t be happier!
Benefits of a Professional Color Consultation
Everyone interprets colors differently, which means there are no “perfect paint colors”; however, working with a certified color designer can help remove stress and provide guidance to find colors that will work for your home. To best prepare for your color consultation we recommend looking for inspiration on Pinterest or around your neighborhood to get ideas. Some things to consider are:
Do you like high or low contrast between body and trim colors?
How do you want your space or home to feel? Examples might include clean, open, dramatic, warm, inviting, etc.
Are your fixed features (things you won’t be changing within the space) overall cool or warm in undertone?
Are there any color families or colors you would like to avoid?
Even when working with a color consultant it’s important that you bring your opinion and vision for the space to the conversation. Ultimately, you are the one that has to live with the colors and everyone has different preferences when it comes to colors they like or dislike. That being said, your home, the surrounding areas, and fixed features must be taken into consideration. These can be limiting factors when choosing paint colors, so it’s best to go into your appointment with an open mind.
If you feel like Lexi or Yasmine could help you narrow down your colors and provide some professional guidance, you can schedule a Color Consultation HERE
Do paint companies take care of all the necessary prep work first, or do you have to do that yourself?
Should you expect to pay a deposit?
What happens if your new paint ends up failing, or gets damaged?
The answers to these questions definitely depend on who you decide to work with.
While every paint company operates differently, it is important to understand what is most important to you and your project before signing with any ol’ paint company (see 10 Questions to Ask Your Painter).
That being said, here is what you can expect when you choose Kind Home for your interior paint project!
1,2, and 3 Year No-Exclusion Warranties
It’s important to note that most paint companies do not warranty interior painting and it may be rare to find a company that is willing to do so.
At Kind Home Painting Company, we want you to rest easy after your paint project is completed. That’s why we offer 1, 2 and 3 year warranties for our interior painting projects.
Depending which of our warranty/product options is right for you and your project, you can rest easy knowing that we stand behind our workmanship and cover any chipping, peeling, cracking, and fading that may occur.
From kids, pets, coffee spills and everyday bumps and knicks, life happens, so leave the paint to us!
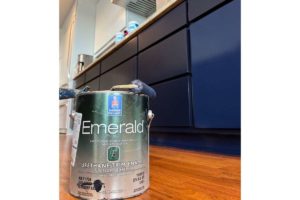
The Best Interior Paint Products on the Market
We always suggest that you do your research on different types of paint products and the tiers offered from different paint manufacturers.
When you are in the hunt for the right painter for your project, be sure to ask about what kind of paint they plan to use.
Ever worked with a contractor that seems to conveniently fall off the face of the earth when you need them most?
When you work with us, you don’t have to worry about that anymore. You can always rely on your designated Account Manager to always be there for you through the entire process of your interior paint project.
Your Account Manager will be there to assist with coordinating your project and continual support from start to finish.
Conveniently available from the office Monday through Friday by call, text, or email, they are here to assist with scheduling changes, product education, colors, and whatever else you may need to ensure your project stays on track for a smooth, one-of-a-Kind painting experience!
Complimentary 1-Hour Color Consultation
One of the biggest pain points we’ve found that homeowners struggle with is paint color selection.
With so many colors and options to choose from, color selection can be overwhelming. That’s why we offer professional color consultation services to help you make a confident and educated decision on your paint color choice.
For any of our clients that choose to work with us, you’ll be provided with this amazing service.
With our professional color consultations, there’s not even a need to leave your house! One of our certified color designers will come out to meet with you at your home to assist with your color selections, ordering samples, and continual support until you have found the colors of your dream home.
Our Color Designers can even provide you with professional mock-ups of different color options in your space.
Some companies may offer similar color consultation services. Be sure to ask them about their rates and if the Color Consultant is out-sourced or employed by your paint contractor.
Project Manager
If you’ve ever worked with a contractor that doesn’t show up on time, doesn’t respond when issues arise or fails to communicate with you throughout your project, you are not alone.
We’ve worked tirelessly to curate an outstanding customer experience for interior paint projects. That’s why we’ll provide you with a reliable Project Manager that will work with you on site throughout the entire production process. They will be there to manage your paint crew and all expectations from start to finish.
Your designated Project Manager will schedule a preliminary walk-through with you to personally confirm all the details of your project, including the scope and color placement, and answer any questions you may have.
They will work with our paint crew and make sure they are set up for success.
Your Project Manager will also conduct a final walk-through with you upon painting completion to ensure that everything looks great and you are completely happy with the results!
Meticulous Prep Work and Cleanup
When working with a professional painter it is essential that they perform meticulous prep work before any painting begins. We believe that proper preparation will lead to a successful paint job that will look outstanding and last for years to come.
Be sure that your painter takes all of the precautionary measures to protect your surfaces, fixtures and furniture from any paint splatter or paint drips.
The last thing you want after your paint project is complete is to find out that all of your furniture is covered with paint dust.
We hold our painters to a high degree of professionalism. We have tirelessly perfected our interior paint preparation process over the years.
From carefully protecting your furniture, floors, and fixtures, to removing wall plates and filling in nail holes and small cracks–we’ve got you covered!
No Deposit and Satisfaction Guarantee
If the painter you choose to work with asks for a deposit upfront, that could be considered a red flag. We’ve had countless homeowners contact us after they had a bad experience with another painter that wound up leaving them with unfinished work.
We will never ask for any payment upfront. In fact, we won’t ask for a penny until the work is done, you’ve had your final inspection with your designated Project Manager, and are loving your newly transformed home!
Conclusion
An interior painting project can be a lot to take on. With so many professional painters available in Colorado, it can be overwhelming. We always suggest that you do your due diligence when choosing a painting contractor and be sure to ask detailed questions about their processes and offerings.
If you would like a free consultation, feel free to fill out our estimate request form HERE.
Are you tired of the look of your kitchen cabinets but don’t want to spend a fortune on a full remodel?
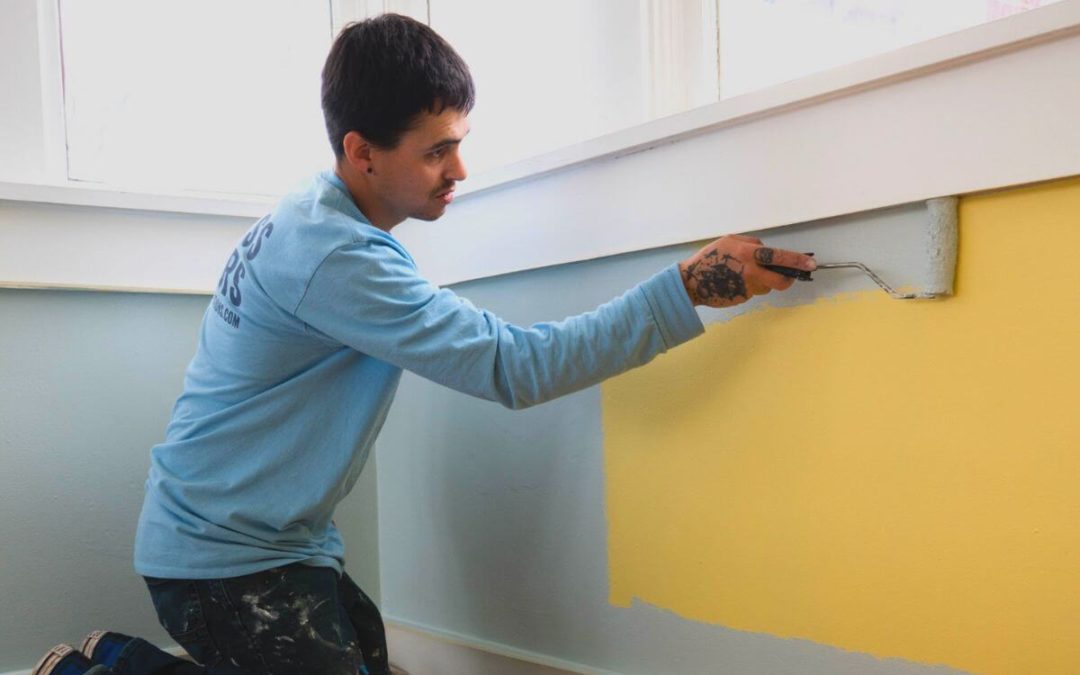
Painting your cabinets can give your kitchen a fresh new look without breaking the bank. Here’s a step-by-step guide to painting your kitchen cabinets.
If you are looking to paint your kitchen cabinets yourself here is a list of materials you will need:
Screwdriver or drill (for removing hinges and handle hardware)
While painting your cabinets yourself may seem like an easy task to undertake, it can take a lot of time and effort to do it right. Too often we’ve seen homeowners attempt to repaint their cabinets with the goal of getting a professional finish only to wind up disappointed in the outcome.
That’s why we always suggest working with a professional painter to handle such a project.
Our team of expert painters will transform your cabinets right before your eyes. If you’re interested in professional cabinet painting by Kind Home Painting Company, you can request your free consultation HERE.
Step 1: Establish a Game Plan for the Project
Before tackling your project, it is important to set a game plan on how you are going to work through the project.
Ask yourself: where are you going to organize and store the items in your cabinets? Where are you going to paint the doors and drawers?
What type of finish do you desire for the cabinets (sprayed or brushed/rolled)? What color should you choose and how will it affect the space?
Depending on the size of your kitchen and number of cabinets/doors/drawers, it is usually easiest to take all of the doors and drawers to a separate location for more room. The garage or another room adjacent to the kitchen are great options to prep your cabinet doors and drawer faces.
Take a photo or create a mock-up diagram of your kitchen cabinets before you remove the doors and drawers.
Label the diagram of your door and drawers with a number or alphabetical system, i.e. top left cabinet is “1”, top middle cabinet door is “2”, top right is “3”, left drawer is “5”, etc.
As you remove the cabinet doors and drawers, write the same letter or number on the inside of the hinge as your diagram. This will save you a lot of time when it comes time to reinstall your doors and drawers to the boxes!
Step 2: Preparation
The first step is to remove all items from inside the cabinets and drawers, and lay paper floor covering on the floor and tape the edges tight to the base trim of the cabinet boxes to protect it from paint drips (this is much more reliable than drop clothes which can slide around).
Remove any hardware, such as handles and knobs, using a screwdriver. You’ll also need to remove the hinges and place them inside of the same cabinet boxes so that everything goes back in the same place.
This will make it easier to adjust the cabinet doors to be plumb and level upon completion. Label the inside of the hinge cup on each door and the inside of the box with a piece that matches your diagram or photo.
Use painter’s tape to mask off areas you do not want to paint, such backsplashes, walls, ceilings, or countertops.
Clean the face of each cabinet door and drawer with a mild degreaser, such as Krud Kutter or SimpleGreen, to remove any built up grease or residue. Wipe any excess degreaser with warm water and a clean tack cloth.
Step 3: Sanding
Using sandpaper or sponge sanding sponge (180 to 220-grit), sand the surface of the cabinets, drawers, and doors.
This will help the primer adhere better to the surface. After sanding, wipe down the surfaces with a tack cloth to remove any dust.
Step 4: Priming
Apply a quality stain blocking primer to the surfaces using a paintbrush, roller, or airless sprayer. Be sure to follow the manufacturer’s instructions for application and drying time. The primer will help the paint adhere better and cover any imperfections.
Once the primer coat has dried, if there are any imperfections on the cabinet boxes, doors or drawers (i.e. sags from too much product, dust, a rouge hair, etc.) a light scuff sand of those areas will smooth out the surface. After that you’re ready to apply your finish coats!
Step 5: Painting
Once the primer has dried, you can apply the paint. Use a paint sprayer, paintbrush or roller to apply the paint evenly.
Be sure to follow the manufacturer’s instructions for application and drying time. You may need to apply multiple coats to achieve the desired color and finish.
Step 6: Finishing Touches
Once the paint has dried completely, you can reattach the hardware and remove the painter’s tape. Inspect your work and touch up any areas that need it.
Upgrade Your Kitchen Cabinets Today!
In conclusion, painting your kitchen cabinets is a great way to give your kitchen a new look without spending a lot of money. With the right materials and a little bit of patience, you can transform your kitchen into a beautiful space that you’ll love spending time in!
Reach out to our team at Kind Home Painting Company if you have any questions and we’d be happy to help you with your cabinet painting project!
Finding the perfect paint colors for the exterior of your home is hard, but it’s even harder when you’re part of an HOA. HOAs, or Homeowners Associations, are great because they help protect the value of homes within the neighborhood and help create a cohesive feeling throughout the community. That being said, they can also be a pain to work with. Here are tips straight from your Colorado paint pros about how to submit your exterior paint colors to your HOA for approval along with a selection of popular HOA color schemes curated for you by our professional color consultants.
Before You Submit Colors to Your HOA
There are a few things you need to know before you’re ready to submit any colors to your HOA.
1. Check for Pre-Approved Colors
If you’re lucky enough to be part of an HOA with a list of pre-approved color schemes, then yay! Pre-approved colors can greatly improve your chances of approval and some HOAs don’t even require approval for pre-approved schemes! While pre-approved colors can limit your options, it will make the selection process much easier.
2. Ask About Their Specific Approval Process
Every HOA is different, so you’ll want to contact your specific HOA directly for details about their color approval process and requirements. Some HOAs require a submission fee and paint chips or color links, while others may require you to paint samples on your garage so they can be viewed before approving. It’s best to accommodate these steps as much as possible and work within your HOA’s guidelines. Othersies, you may wind up with any issues.
Note that you will most likely not be able to use colors that are too similar to your neighbors. Many HOAs value variation between each home. If you submit colors that are the same or similar to the neighbors on either side of your home or across the street, they will likely be denied and a waste of time.
3. Plan Accordingly
Most HOAs review color scheme submissions at a meeting together before they approve or deny your any paint colors. That means that the frequency of which your HOA meets could have a big impact on your project timeline. Here in Colorado, HOAs typically have 14-60 days for approval. Highlands Ranch, HRCA, is one of the fastest turn around times for color approvals with homeowners typically receiving approval within 1-2 weeks.
If your HOA requires more than a couple of weeks to approve colors then you’ll want to make sure you plan your paint project accordingly. It’s vital to make sure you have enough time to select colors, submit them, and get approval before any paint is purchased. Otherwise, this can create delays on your project and be costly to change.
HOA Friendly Color Schemes from Color Consultants
Exterior Color Scheme #1
Created using Sherwin Williams Color Snap Visualizer
In this color scheme we have a classic gray body with just a touch of warmth. We find this color scheme to be warm and inviting. Shoji White on the trim brings a nice contrast without feeling too sharp, and a deep red door helps everything feel grounded and harmonious.
Green saw a huge surge in popularity last year with Evergreen Fog being a favorite amongst homeowners. We’ve paired it here with Alabaster, which is a beautiful, bright white. Dark Night adds a dark, but subtle accent.
Blue is one of the most commonly requested colors for the exterior of homes. It’s also the most common favorite color in the world, so that makes perfect sense! Slate Tile is a stunning blue-gray that really gives you that punch of blue without looking cartoonish. We’ve paired it here with the crisp Pure White and have Peppercorn as a warm, grounding accent color.
This scheme is perfect for those of you who have a craftsman style home and want a traditional color scheme that doesn’t feel dated. Craftsman Brown is a nice neutral and when paired with Roycroft Bronze Green it feels like a classic Colorado color combination. We’ve rounded it out with Roycroft Copper Red which would make for a fantastic front door color, but please DO NOT use it on shutters as this can result in a clown-like appearance.
Gray never goes out of style and Grey Matters is a wonderful, middle of the road option that isn’t too warm or cool. To make sure this scheme didn’t end up feeling too warm, we paired it with classics like Pure White on the trim and Tricorn Black as the accent.
Fun fact–Tricorn Black is the absolute darkest black paint color available from widely available paint retailers!
Getting HOA Approval
What makes these schemes HOA friendly is that they are all neutrals, or based on earth tones, which is a huge trend for covenant controlled neighborhoods here in Colorado. If you need more inspiration we recommend driving around your own neighborhood to view other homes. This will help you get ideas for what you’d like to see on your own home. For more color tips and tricks be sure to follow us on Pinterest and Instagram where we post weekly!
If you need any further assistance with selecting colors, you can easily schedule an appointment with one of our certified Color Designers HERE. And if you’d like more information, feel free to give us a call at (720) 637-4805.
When a client begins the process of painting their home there are often times we find another service may be needed prior to paint. As a Denver painting company we are primarily working on homes that are 20+ years old, so wear and tear is a factor on every project. One of the most common issues we run into when painting is damaged stucco. Stucco damage occurs over time and is very common, especially with the fluctuations in temperature that we experience here in Colorado. We work with a local stucco company that does incredible work to help our clients get the best finished product possible.
Can You Paint Stucco?
We get asked all the time whether or not you can paint stucco. Yes, you absolutely can paint stucco! Painting stucco is an easy and cost effective way to refresh faded or dingy stucco and create a fresh and uniform look. Much like paint, stucco is tinted with pigments to give it it’s color. When using any exterior product we all know nothing can last forever and stucco is no different. Over time you may experience a variety of failures with your stucco including fading or discoloration.
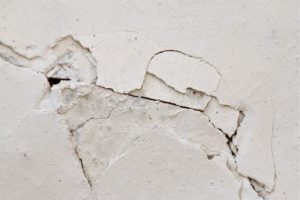
What Does Stucco Damage Look Like?
Identifying stucco damage is one of the first steps when it comes to painting or maintaining your stucco home. We recommend each homeowner do a thorough inspection and note any areas of concern. You can alternatively work with a stucco or paint professional to review the current condition of your stucco.
During this inspection be sure to note any damage to the stucco. Some things to look out for include fading, discoloration, cracking, or even missing pieces of stucco. It’s wise to look near gutters and downspouts, around windows and doors, and along the foundation and at corners. These are some of the areas where you’ll often experience failures in the stucco first.
When Should You Contact a Stucco Expert?
For many stucco issues like fading, discoloration, or hairline cracks your exterior painter will be able to take care of those items. These issues are often either fixed by the paint itself or a stucco repair compound is used to fill in smaller cracks. If you’re experiencing larger issues with your stucco, then be sure to talk to an expert as your home will require more extensive repairs.
Any larger stucco repairs should be taken care of ahead of painting so that they have time to set. Don’t worry about matching your existing stucco exactly with the repair as it will be covered with the fresh coat of paint.
Denver’s Best Stucco Repair
Being in the industry, we’ve been lucky enough to make some incredible connections within the home improvement field. Since we work with a lot of clients with stucco homes we’ve partnered with Sarge and Co. Professional Stucco Services. Perry Babel and his team bring decades of experience and knowledge to every project and can help with big or small stucco projects. Sarge and Co. is locally based and operated out of Morrison, Colorado and Perry services all of the Denver metro area.
Whether you are painting or not, you should always address stucco repairs as quickly as possible because they can lead to more extensive damage. If you’re considering painting your stucco then schedule a free consultationto get the ball rolling.