
by Corey Morgan | Aug 9, 2024 | Exterior Painting, Paint Color Help, Paint Prep
At Kind Home Painting, we believe in giving back to the community and supporting local organizations that make a significant impact. Recently, we had the incredible opportunity to work with DIRT Coffee, a nonprofit dedicated to creating inclusive workspaces for the neurodivergent population. Their mission, “Divergent Inclusive Representation Transforms,” is about cultivating intentional work environments where neurodivergent individuals can gain meaningful, integrated, and equitable employment.
DIRT Coffee started as a mobile coffee truck in 2013 and has since expanded to two brick-and-mortar programming sites across the Denver Metro area. These sites employ, train, and empower neurodivergent individuals, helping them achieve greater independence and success.
The Paint Project
DIRT Coffee recently acquired a historic building in downtown Littleton, which required significant renovation, including a much-needed repainting. Having seen some of our previous work with local organizations like Hope House and A Precious Child, they reached out to us to see if we’d be interested in helping. One of our employees had previously worked with DIRT Coffee, so we were especially excited to jump at the chance to support their mission.

The Transformation
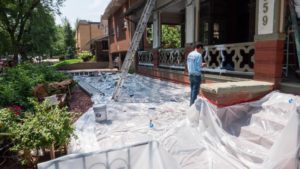
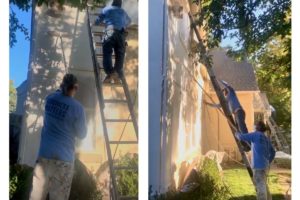
Transforming DIRT Coffee’s new home was no small feat. The project required nearly 30 gallons of paint and over 140 man-hours. Our team dedicated time and effort to ensure the historic building’s new look would reflect DIRT Coffee’s vibrant and inclusive brand. Here’s a breakdown of what we did:
- Initial Assessment: We conducted a thorough assessment of the building to determine the best approach for the repainting project, taking into account the building’s historic features and the desired color scheme that aligns with DIRT Coffee’s branding.
- Preparation: Proper preparation is key to a successful paint job. We carefully prepped the surfaces, ensuring any old paint was removed and the surfaces were ready for new paint.
- Painting: Using the highest performing paint from Sherwin-Williams, our team meticulously painted the exterior and interior of the building. This high-quality paint was chosen for its durability and longevity, ensuring it will hold up better over time, especially as this space will be a commercial hub. The chosen colors were selected to reflect DIRT Coffee’s welcoming and inclusive environment, ensuring the space feels warm and inviting.
- Finishing Touches: Attention to detail is crucial, especially for a historic building. We added finishing touches to ensure every aspect of the paint job was perfect, from trim work to final touch-ups.
Expanding Dirt Coffee’s Services and Impact
This new building and its renovation are not just about aesthetics; they are about expanding DIRT Coffee’s ability to offer even more services to help neurodivergent people thrive in the workplace. With the new space, DIRT can broaden its training programs and provide more employment opportunities, furthering their mission and making a greater impact on the community.

Why This Matters
Supporting organizations like DIRT Coffee is at the heart of what we do at Kind Home Painting. By transforming their new historic home in Littleton, we hope to contribute to their mission of empowering neurodivergent individuals. We believe that a beautifully painted environment can inspire and uplift, creating a space where employees and customers alike feel welcome and valued.
A Partnership Built on Shared Values
Our partnership with DIRT Coffee is a testament to the power of community and shared values. We are proud to support an organization that is making a real difference in the lives of neurodivergent individuals. By providing our painting services, we hope to help DIRT Coffee continue their important work in a space that truly represents their mission and values.
Looking Forward
As DIRT Coffee settles into their new home, we look forward to seeing the positive impact they will continue to make in the community. We are grateful for the opportunity to have played a part in their journey and are committed to supporting more local organizations in the future.
For more information about DIRT Coffee and their mission, visit their website. To learn more about our community projects and how we can help with your painting needs, contact us at Kind Home Painting.
By sharing this story, we hope to inspire others to get involved and support local organizations that are making a difference. At Kind Home Painting, we are dedicated to giving back and creating beautiful spaces that reflect the heart and soul of our community.
by Corey Morgan | Apr 21, 2023 | Exterior Painting, Paint Prep
Denver’s Best Stucco Repair
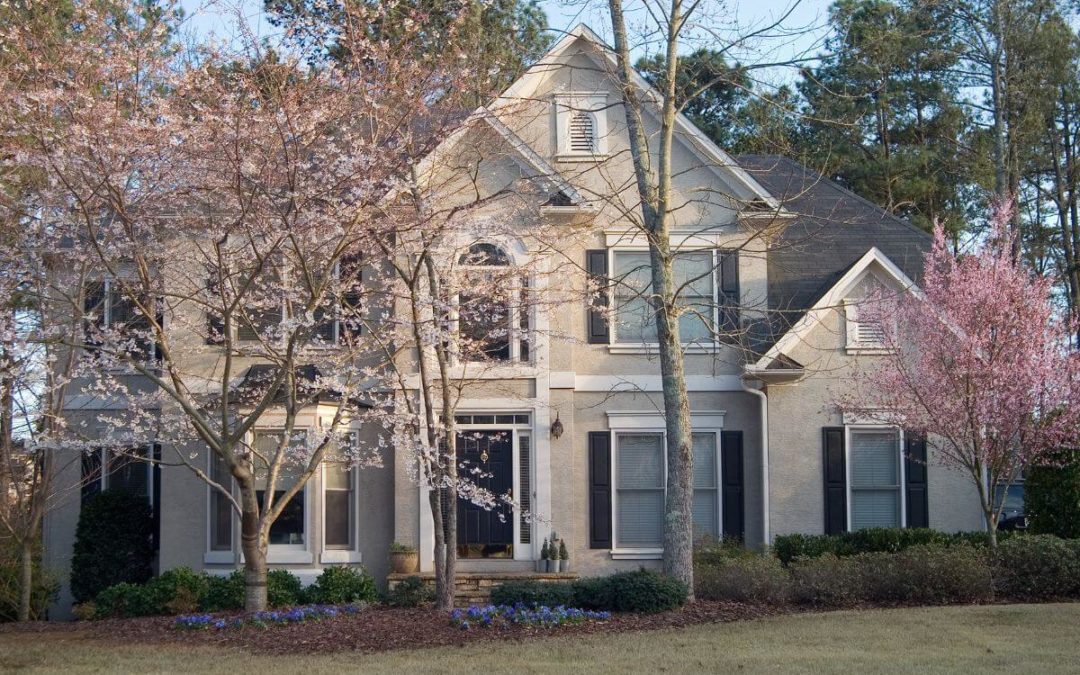
When a client begins the process of painting their home there are often times we find another service may be needed prior to paint. As a Denver painting company we are primarily working on homes that are 20+ years old, so wear and tear is a factor on every project. One of the most common issues we run into when painting is damaged stucco. Stucco damage occurs over time and is very common, especially with the fluctuations in temperature that we experience here in Colorado. We work with a local stucco company that does incredible work to help our clients get the best finished product possible.
Can You Paint Stucco?
We get asked all the time whether or not you can paint stucco. Yes, you absolutely can paint stucco! Painting stucco is an easy and cost effective way to refresh faded or dingy stucco and create a fresh and uniform look. Much like paint, stucco is tinted with pigments to give it it’s color. When using any exterior product we all know nothing can last forever and stucco is no different. Over time you may experience a variety of failures with your stucco including fading or discoloration.

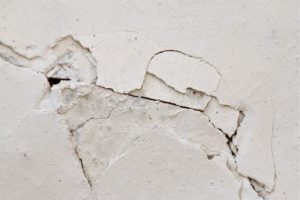
What Does Stucco Damage Look Like?
Identifying stucco damage is one of the first steps when it comes to painting or maintaining your stucco home. We recommend each homeowner do a thorough inspection and note any areas of concern. You can alternatively work with a stucco or paint professional to review the current condition of your stucco.
During this inspection be sure to note any damage to the stucco. Some things to look out for include fading, discoloration, cracking, or even missing pieces of stucco. It’s wise to look near gutters and downspouts, around windows and doors, and along the foundation and at corners. These are some of the areas where you’ll often experience failures in the stucco first.
When Should You Contact a Stucco Expert?
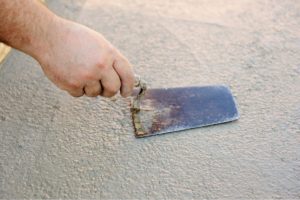
For many stucco issues like fading, discoloration, or hairline cracks your exterior painter will be able to take care of those items. These issues are often either fixed by the paint itself or a stucco repair compound is used to fill in smaller cracks. If you’re experiencing larger issues with your stucco, then be sure to talk to an expert as your home will require more extensive repairs.
Any larger stucco repairs should be taken care of ahead of painting so that they have time to set. Don’t worry about matching your existing stucco exactly with the repair as it will be covered with the fresh coat of paint.
Denver’s Best Stucco Repair
Being in the industry, we’ve been lucky enough to make some incredible connections within the home improvement field. Since we work with a lot of clients with stucco homes we’ve partnered with Sarge and Co. Professional Stucco Services. Perry Babel and his team bring decades of experience and knowledge to every project and can help with big or small stucco projects. Sarge and Co. is locally based and operated out of Morrison, Colorado and Perry services all of the Denver metro area.
Whether you are painting or not, you should always address stucco repairs as quickly as possible because they can lead to more extensive damage. If you’re considering painting your stucco then schedule a free consultation to get the ball rolling.
by Corey Morgan | Aug 29, 2022 | Exterior Painting, Paint Prep
As a Denver painter, Kind Home Painting Co. sees a wide variety of home styles, ages, shapes and sizes. That means we encounter quite a few lead-based homes. If you live in the Denver area and are considering painting your home, you should be aware of how to properly handle lead paint. As we all know, lead-based paint can be harmful and very dangerous if handled improperly.
If you are hiring a professional you should be sure that you work with a lead certified renovator. It’s not against the law to work with painters that aren’t lead-certified renovators. However, lead-based renovations are regulated by the EPA and it is in your best interest to work with lead-certified renovators. As a lead-certified painter we take every precaution when it comes to painting lead homes and we participate in on-going training and certifications. Keep reading to learn what you should be aware of when painting a lead positive home.
What to Be Aware of When Painting a Lead Home
Testing for lead paint
The first thing you need to consider is the age of your home. Lead-based paint was commonly used on residential homes until it was banned from residential use in 1978. So, if your home was built prior to 1978 it is likely lead positive and you will need to test for lead. If your home was built after this it is likely lead-free, but it may still be smart to have it tested for lead if it was constructed close to that date.
You can identify lead paint just by looking at it if you know what to look for. When lead paint starts to deteriorate it will begin to crack and chip off. We usually say it looks like alligator skin when it begins to deteriorate! Your paint could still be lead-based without showing these characteristics. That’s why your painter should always test the paint and not make any assumptions.
The process for testing for lead paint is very simple. A lead test is easily performed by rubbing a lead test swab on the exterior siding of your home or taking a chipped off piece of paint and testing that sample. It is important to test multiple areas of the home for lead as well. Some areas may not come up as lead positive while others may. They will have the results almost immediately.
If your home is lead positive, don’t panic! It is not as big a deal as you may think. The important thing is that your painter is certified to handle lead and takes all the necessary precautions to contain it.
The dangers of lead paint
Most adults know better than to go around putting paint chips in their mouths, but most kids do not (and your pets definitely don’t know any better!). That’s why dealing with lead is all about containment and proper disposal. The last thing you want is to have any paint chips left behind for pets or kids to play with.
One of the more common ways that you or your loved ones may be exposed to lead paint is from dust. Dust from lead paint is one of the biggest issues that occurs when renovating a lead-positive space. Dust from lead paint can contaminate your soil and get tracked into your home. If there is enough lead dust accumulation it can become very hazardous. That’s why it is so important to mitigate lead contamination when painting or performing any other renovations. If your painter isn’t taking the proper precautions when handling lead, it can become a big problem. If you ‘d like to learn more about the dangers of lead paint you can check out the EPA’s Renovate Right Pamphlet.
Our process for handling lead paint
1. Never Pressure Wash A Lead Home
While we typically pressure wash all exterior projects prior to painting, we will never pressure wash a lead positive home. This is to ensure that we contain any lead from spreading or contaminating any areas. Our painters will hand wash the home as necessary to ensure the surface is clean and ready for a fresh coat of paint.
2. No Sanding
We will never sand any of the surfaces either. Sanding will obviously create a lot of unwanted dust. Our goal is to create as little dust as possible. The less dust we create, the safer you, your family and your pets are.
3. Collecting & Disposing of Lead Paint Chips
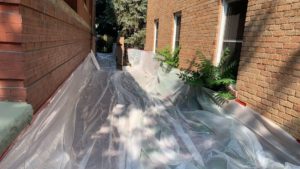
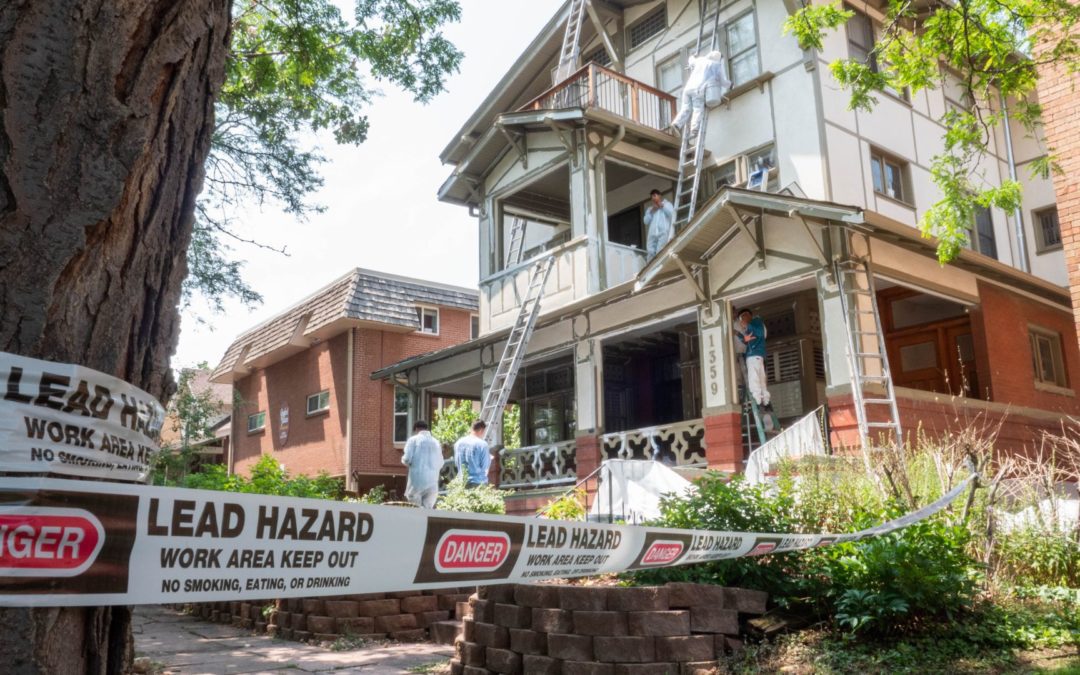
Now, while our process will ensure as little dust and spreading of lead particles as possible, we may need to scrape areas to prep them for a new coat of paint. As you likely know, lead paint will crack and tends to look a lot like alligator skin. In order to prep those areas, our painters will inevitably need to scrape away that failing paint. Don’t worry though, we will always put down plastic tarps to catch and contain any paint chips. Your Project Manager will ensure that the perimeter of the home and any area being worked on are prepped with plastic. Once our painters are done they will fold up all plastic and dispose of it properly to ensure no further contamination.
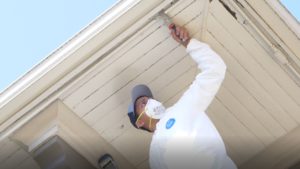
4. Provide Painters with PPE
We always provide all of our painters with PPE (personal protective equipment) on lead positive paint projects. PPE is vital for painters to safely handle lead paint. While it is up to them as to whether or not they use the protective equipment, it is required that we provide them with the proper materials. PPE may include gloves, gowns, shoe covers and face protection.
Conclusion – Precautions to Take When Handling Lead Paint
It is smart to make sure your home is tested for lead prior to any renovations, especially if your home was built prior to 1978. There are a lot of rules and regulations around proper handling of lead. That’s why you should always work with a lead-certified painter that is equipped to handle such a project. Your painter should never pressure wash or sand a lead paint project in order to minimize the creation of lead dust. And lastly, you should always make sure to collect any and all paint chips and properly dispose of them.
If you are looking for a Denver painter that can handle your lead paint project, look no further! To get a free estimate give us a call at (720)-6374805 or contact us HERE. If you have any questions please don’t hesitate to reach out!
by Corey Morgan | Aug 11, 2022 | Exterior Painting, Paint Prep
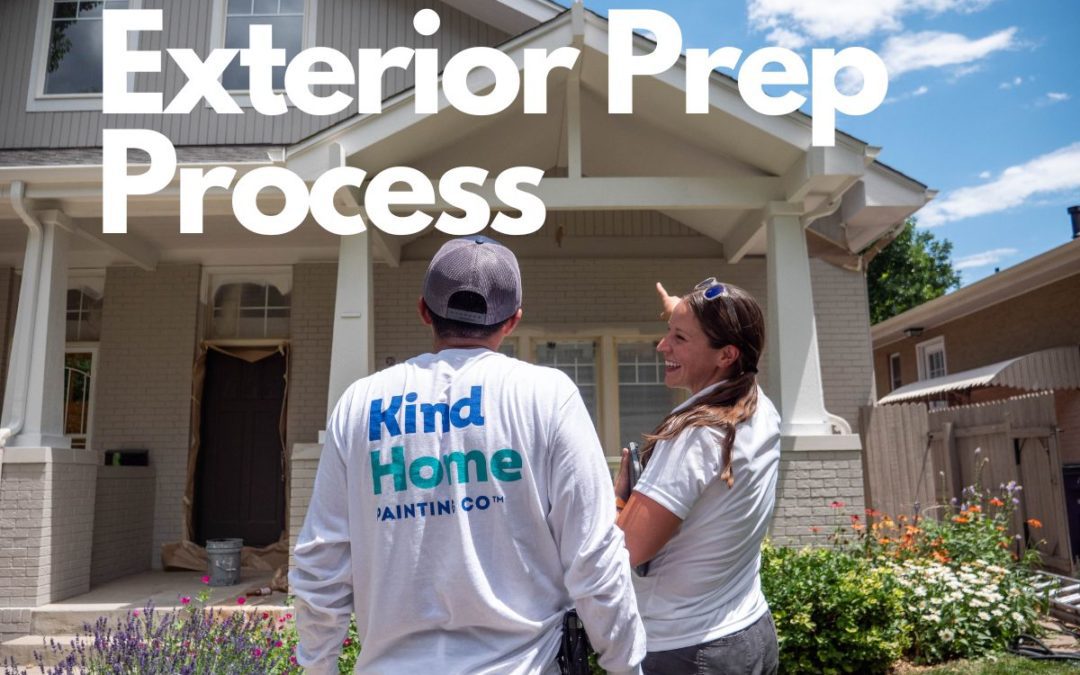
The Best Exterior Paint Prep
Kind Home Exterior Paint Prep Process
PREP is arguably the most important step in any paint project, but great prep is especially important for exterior painting. If you want your exterior painting project to last, it is vitally important to perform detailed prep. This rings even truer for Denver home painting where we have rampant weather patterns and harsh sun exposure. You should never expect to be able to just slap some paint on the side of your home and call it good. Without solid prep you are setting yourself up for failure. In this article we will detail the Kind Home exterior paint prep process and the importance of following these necessary steps when you have your home painted.
Paint Prep Steps

For any exterior painting project in the Denver area you should always inspect the home for rotted, damaged boards, dirty areas and loose nails/boards. We always perform the following on any exterior prior to painting to ensure that the surface is well protected and ready for paint:
- Pressure wash
- Repair damaged gutters
- Perform any woodwork repairs
- Mask off all windows & doors & protect surfaces
- Scrape failing paint
- Caulk
- Prime where necessary
Preliminary Services (Before Painting)
It’s important that we take care of a few items before your Project Manager and paint crew ever get to the job site. These items include pressure washing, gutter replacement and woodwork. We refer to this stage as preliminary services. Our Preliminary Service technicians will handle this portion of your project 1-2 weeks prior to painting to ensure that everything is complete in a timely manner and your home is ready for our paint crew when it comes time to paint.
Pressure Wash
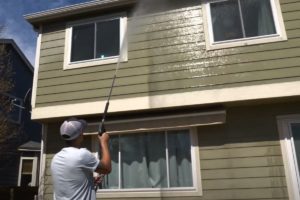
We pressure wash the exterior of every home we paint. This is a light rinse to rid the home of dirt, cobwebs, debris and oxidation and to ensure that the paint has a clean surface to adhere to. If you don’t clean the surface first, paint will have a difficult time sticking to the exterior and it can cause problems down the line. The pressure wash should take between thirty minutes to an hour and is a non-invasive process. Our Pressure Wash Technician will just need access to your water spigot and all four sides of the home. You’ll want to make sure all doors and windows are closed!
Replacing Damaged Gutters
If your gutters are leaking it is a good idea to replace them. We provide gutter replacement services for any paint project that needs new gutters. The last thing you want is to have a leaky gutter damaging your freshly painted exterior. This can lead to early erosion of your paint, and even worse, rotted or swollen boards.
Woodwork
Woodwork is not a step to be overlooked. You can think of paint as the epidermis of the home. It is there to protect the substrate and fight off moisture and dirt. Over time though, your paint can wear down and allow for that moisture to penetrate the surface underneath. This leads to rotted and swollen boards. If your exterior has any rotting we always recommend getting those replaced. The longer you hold off on replacing damaged boards, the more it will cost you in the long run. Our woodworking team can take care of any and all of your wood replacement needs.
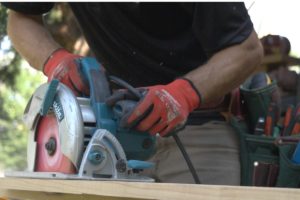
While there are some damaged boards that can get by with fillers and sealants, it is typically better to have them fully replaced. Without fully replacing a board it is at higher risk of failing quicker and allowing moisture to compromise the substrate. Not only will a new board hold up longer, it is more aesthetically pleasing. It is also important to be mindful of boards in areas where snow can build up. These spots on your home will be the first to have failing paint and rotted boards. During this step it is also important to re-secure any loose boards. You may notice loose nails or areas where nails have already popped out. We will be sure to nail those boards back in or use screws to secure them.
We will typically do woodwork repairs the week prior to painting. Our expert craftsman will ensure that every board is perfectly fit in place and ready for a new coat of paint.
Exterior Prep Process
Now that all of the preliminary services have been completed, it’s time for your Project Manager and paint crew to work their magic!
Masking, Taping & Protecting Your Home
It’s important to ensure that paint never gets where it shouldn’t be. That’s why we take extra precaution to protect your home from any paint overspray, spills or accidents. We always mask off all windows and doors and use drop cloths where necessary. The plastic film and painters tape we use to protect these areas will ensure no paint gets through when we’re spraying or rolling paint.
Scrape Failing Paint
We can’t stress enough how important it is to scrape failing paint to create a smooth surface for the paint to adhere to. We always make sure to scrape areas with bubbling and flaky paint. If you fail to scrape these areas the texture will show through. This step can take some time, but it is vital to a beautiful paint job that will last.

Caulk
Caulking, as we all know, helps to seal up your exterior and protect it from the elements. It is especially important to caulk all seams and receding nail holes. At Kind Home Painting Company we use Shermax Urethanized Elastomeric Caulk . This is a high quality caulk that was created to stand up to the harsh weather patterns we experience.
Some of the areas we will always caulk include:
- Spaces around windows
- Spaces around doors
- Seams where two boards meet
- Recessed nail holes
- Newly replaced boards
It’s important to note that you do not need to caulk all nail holes. We will only caulk the recessed nail holes to ensure that no moisture can seep through the board. If you caulk nail holes that are flush with the board you will be able to see the caulk and that added texture, which can be unsightly.

Priming
Priming, priming, priming! Our painters will always prime any bare wood, newly replaced boards or boards that have taken a beating and could use the added protection. At Kind Home Painting Company we will always prime the first few boards at the bottom of your home. This is to protect those areas from snow and the general wear and tear they are susceptible to.
We also pay close attention to valleys on the roof line where snow can collect and sit for long periods of time. These areas are typically the spots where paint will fail the quickest and boards will rot due to the extended exposure to moisture. To ensure that your paint job lasts we use peel bond primer. This primer is stronger than regular primers and will help seal the surfaces and provide a smoother finish.
Painting
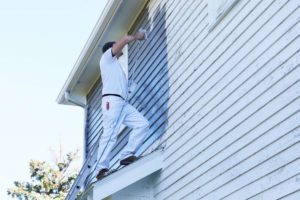
Most homeowners don’t realize how long the prep process takes. This is where our painters will spend the majority of their time when working on your paint project because they understand that a paint job is only as good as its prep. Once we’ve completed all prep and your Project Manager has confirmed that everything is up to our standards, our painters will get to the fun part! The painting portion of any project is typically the fastest. We always spray our exteriors to ensure a smooth, professional and even finish. This is when you can kick back and watch your exterior transform before your eyes.
How to Prep for Exterior Painting
We hope that this article gave you insight into our prep process and what it takes to perform a beautiful paint job that will last for years to come. For inspiration for your Denver exterior paint project be sure to check out our Instagram.
If you would like a free painting estimate, you can fill out our form HERE. Thanks for reading and happy painting!


by Corey Morgan | Jul 22, 2022 | Interior Painting, Paint Prep, Pro Tips
The Best Interior Paint Warranty in Denver
At Kind Home Painting Company we always strive to improve the client experience. It is the driving force behind all we do. We know painting your home is no small feat and it can be an investment of both your time and money. That’s why we want to make sure you feel taken care of even long after we’ve completed your project. With that being said, we have upgraded our interior warranty options for our clients.
Prior to this upgrade we only warrantied interiors for one year. Even a one year interior warranty in our industry is pretty rare. But, as one of the best painting companies in Denver, we believe it is our responsibility to do what is right for our clients and lead by example. That’s why we’ve added up to 3 Years to our Interior warranty. Ultimately, we aren’t warranting just a paint job, but a relationship with you.
Interior Warranty Options
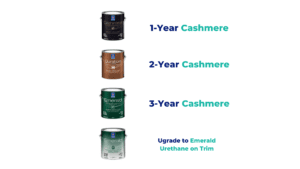
Our new interior paint warranties options for our clients across the Denver metro are as follows:
1 Year Warranty – Sherwin Williams Cashmere
2 Year Warranty – Sherwin Williams Duration
3 Year Warranty – Sherwin Williams Emerald
We have a commitment to only using the highest quality paint products on the market and each of these paint products are Sherwin Williams top-tier interior paints. While you can choose from other paints, these are the only paints that we warranty because we stand behind their quality. Each of these paints are specifically designed for premiere interior painting. They each have their own unique properties that help them stand apart from other paint products.
Contains a silky, low-stipple appearance. It is a paint and primer in one and has a smooth, buttery application.
Ideal for high-traffic residential spaces because it cleans easily and has great durability, especially in moist environments like a bathroom. It also has properties that help it to retain color and have a less visible shine after washing.
Sherwin’s best interior paint. It will provide your walls with exceptional coverage, durability and washability. It is also a paint and primer in one with stain blocking technology to provide you with added protection from wear and tear. Last, but not least, it contains antimicrobial agents that inhibit the growth of mold and mildew.
You can also upgrade Sherwin Williams Emerald Urethane Enamel for painting your interior trim. Emerald Urethane Enamel will provide your trim and doors with a smooth and luxurious finish. This paint was created with a water-based, urethane-modified alkyd to look and feel like an oil finish. This is a paint that is perfect for areas that are frequently cleaned.
What does our Interior Warranty Cover?
Our interior paint warranty covers 100% of our workmanship as well as any fading, chipping, cracking or peeling. We are also happy to cover damage from things like kids, dogs, furniture etc. because we know life happens. Any issues you may have with your paint job we are here to help. We think it’s just the KIND thing to do!

We cover all labor and materials for any interior paint warranty. All you need to do is file a warranty claim and we’ll take care of the rest. All you need to do to file a claim is give our office a call and explain whatever issues you may be experiencing with your paint job. From there we’ll get your warranty scheduled and taken care of within 30 days.
Not All Paint Warranties Are the Same
When it comes to contractor’s house painting warranties, not all are created equal. It’s important to get your warranty in writing, and to make sure that you fully understand the terms and conditions of your warranty. Here are some questions you should make sure to ask about your warranty:
- How long is the warranty good for?
- What does it cover exactly?
- Does it cover workmanship only?
- What does the warranty define as a defect?
- Are materials and labor included?
Be sure to ask your painter these questions before making your decision to work with them or not. We’ve seen painting warranties from painters across the state and there is almost always some fine print or caveat that creates a riff in the warranty process.
Kind Home Painting Co. Interior Warranty
We hope that this helps you to understand our warranty options and what they cover, as well as our philosophy behind why we provide such an outstanding warranty. Your happiness and satisfaction is our top priority and we hope to be your painter for years to come 🙂
For more information, be sure to visit our Interior Painting page, and for inspiration head on over to our Instagram! You can also check out our parent company Kind Home Solutions for even more great content. Thanks for reading!
by Corey Morgan | Jul 20, 2022 | Exterior Painting, Paint Prep, Pro Tips
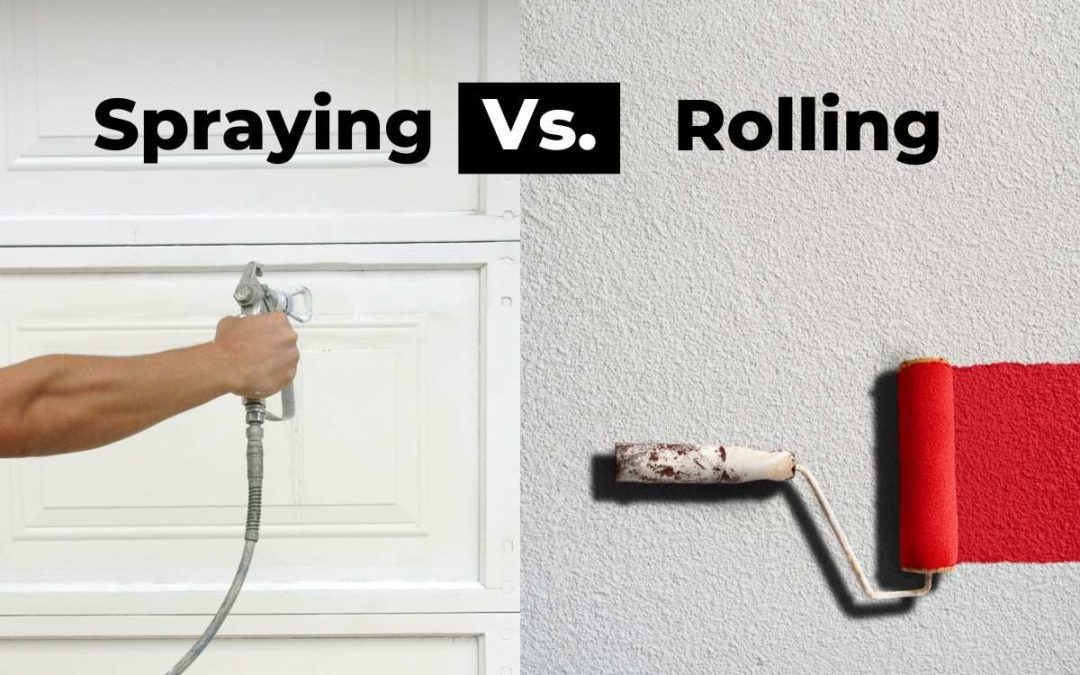
Is Spraying or Rolling Your Exterior Better?
The great painter debate – should you spray or roll exteriors? The answer might surprise you, because your home has a huge impact on whether you should spray or roll your home. This is a pretty controversial topic within the painting community, but we’re here to breakdown the question, is spraying or rolling your exterior better? Read on to learn the pros and cons of both exterior painting techniques.
Pros and Cons of Rolling Your Exterior
Paint rollers have been around since 1940 and Sherwin Williams was the first company to bring them to market. Rollers revolutionized the painting industry by speeding up the paint process and giving painters a better tool to cover larger surface areas. Nowadays, paint rollers come in a variety of sizes and thicknesses to help with any painting project; exterior or interior.
Pros of Rollers
- Great for large, smooth surfaces
- Cheaper than paint sprayers
- No brush marks
- Great for back-rolling to press paint into porous surfaces
Cons of Rollers
- Thin coats can be uneven
- Roller soaks up more paint so you use more product
- More expensive than brushes
- Rollers can’t be used for painting joints, corners, or smaller surfaces
Pros and Cons of Spraying Your Exterior
Paint sprayers and spray guns have actually been around longer than paint rollers. The first hand-held, air-powered paint spray gun was invented in 1907 and there have been many evolutions of that product since. We often find that clients who don’t like paint sprayers had a bad experience with them at some point. Paint sprayers from 30 years ago were quite different than the ones used today. Modern commercial paint sprayers have many benefits and have been optimized for residential and commercial use.
Pros of Sprayers
- Thicker, more even and uniform coats
- No paint waste as paint is not absorbed like with a roller
- Works well on uneven surfaces
- Faster and better application
- No brush or roller marks
Cons of Sprayer
- More expensive than rollers and brushes
- Need experience and practice using them to be effective
- Noisy compared to a roller
Exterior Painting – Spray vs Rolling
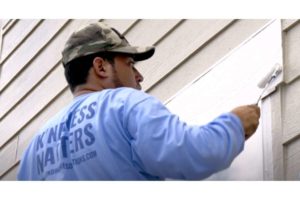
Now to the real question; which of these tools is better? Unfortunately, the answer isn’t so black and white. When it comes to our exteriors we tend to use a sprayer because it’s more efficient, offers better coverage, and gives a more professional finished quality. That being said, it’s important that your painter can utilize both of these tools because that’s what they are – paint tools. At the end of the day these tools can both be utilized to provide the best paint job. For example, if you are painting brick, stucco, or some other porous surface, you will want to use a sprayer to apply the paint and have another team member following with a roller to “back-roll” the paint in. Back-rolling helps to press the paint into the surface and get into those little nooks and crannies.
Kind Home Painters back-rolling the exterior of a Denver stucco home
For smoother surfaces like trim, wood, lap, vinyl, or metal siding, spraying is a much better tool to utilize because you won’t have any of those roller marks and you can angle the sprayer different ways to ensure you are getting full coverage on each board. Ultimately, one isn’t inherently good or bad. These are both great paint tools that should be utilized under different circumstances. To see some of the exterior paint projects we’ve sprayed and back-rolled, check out our gallery HERE. And for more inspiration for your next paint project, be sure to take a peak at our Instagram!
If you would like to get pricing for your project you can submit for a free estimate HERE.